Oct 7, 2024
LMS: Brand Customisations

Rotimi Best
Founder
We are excited to announce more customisations coming into our learning management system (LMS). In this blog post, we will like to share with you how we’ve made YOUR STUDENT DASHBOARD much more customisable than before.
Demo
Your Student Dashboard
Firstly let me quickly break down what we mean when we say YOUR STUDENT DASHBOARD. As an organisation or educator when you sign up on classroomio.com, you’d have to first create your organisation and then create your first course. This whole process is done within the admin dashboard - app.classroomio.com.
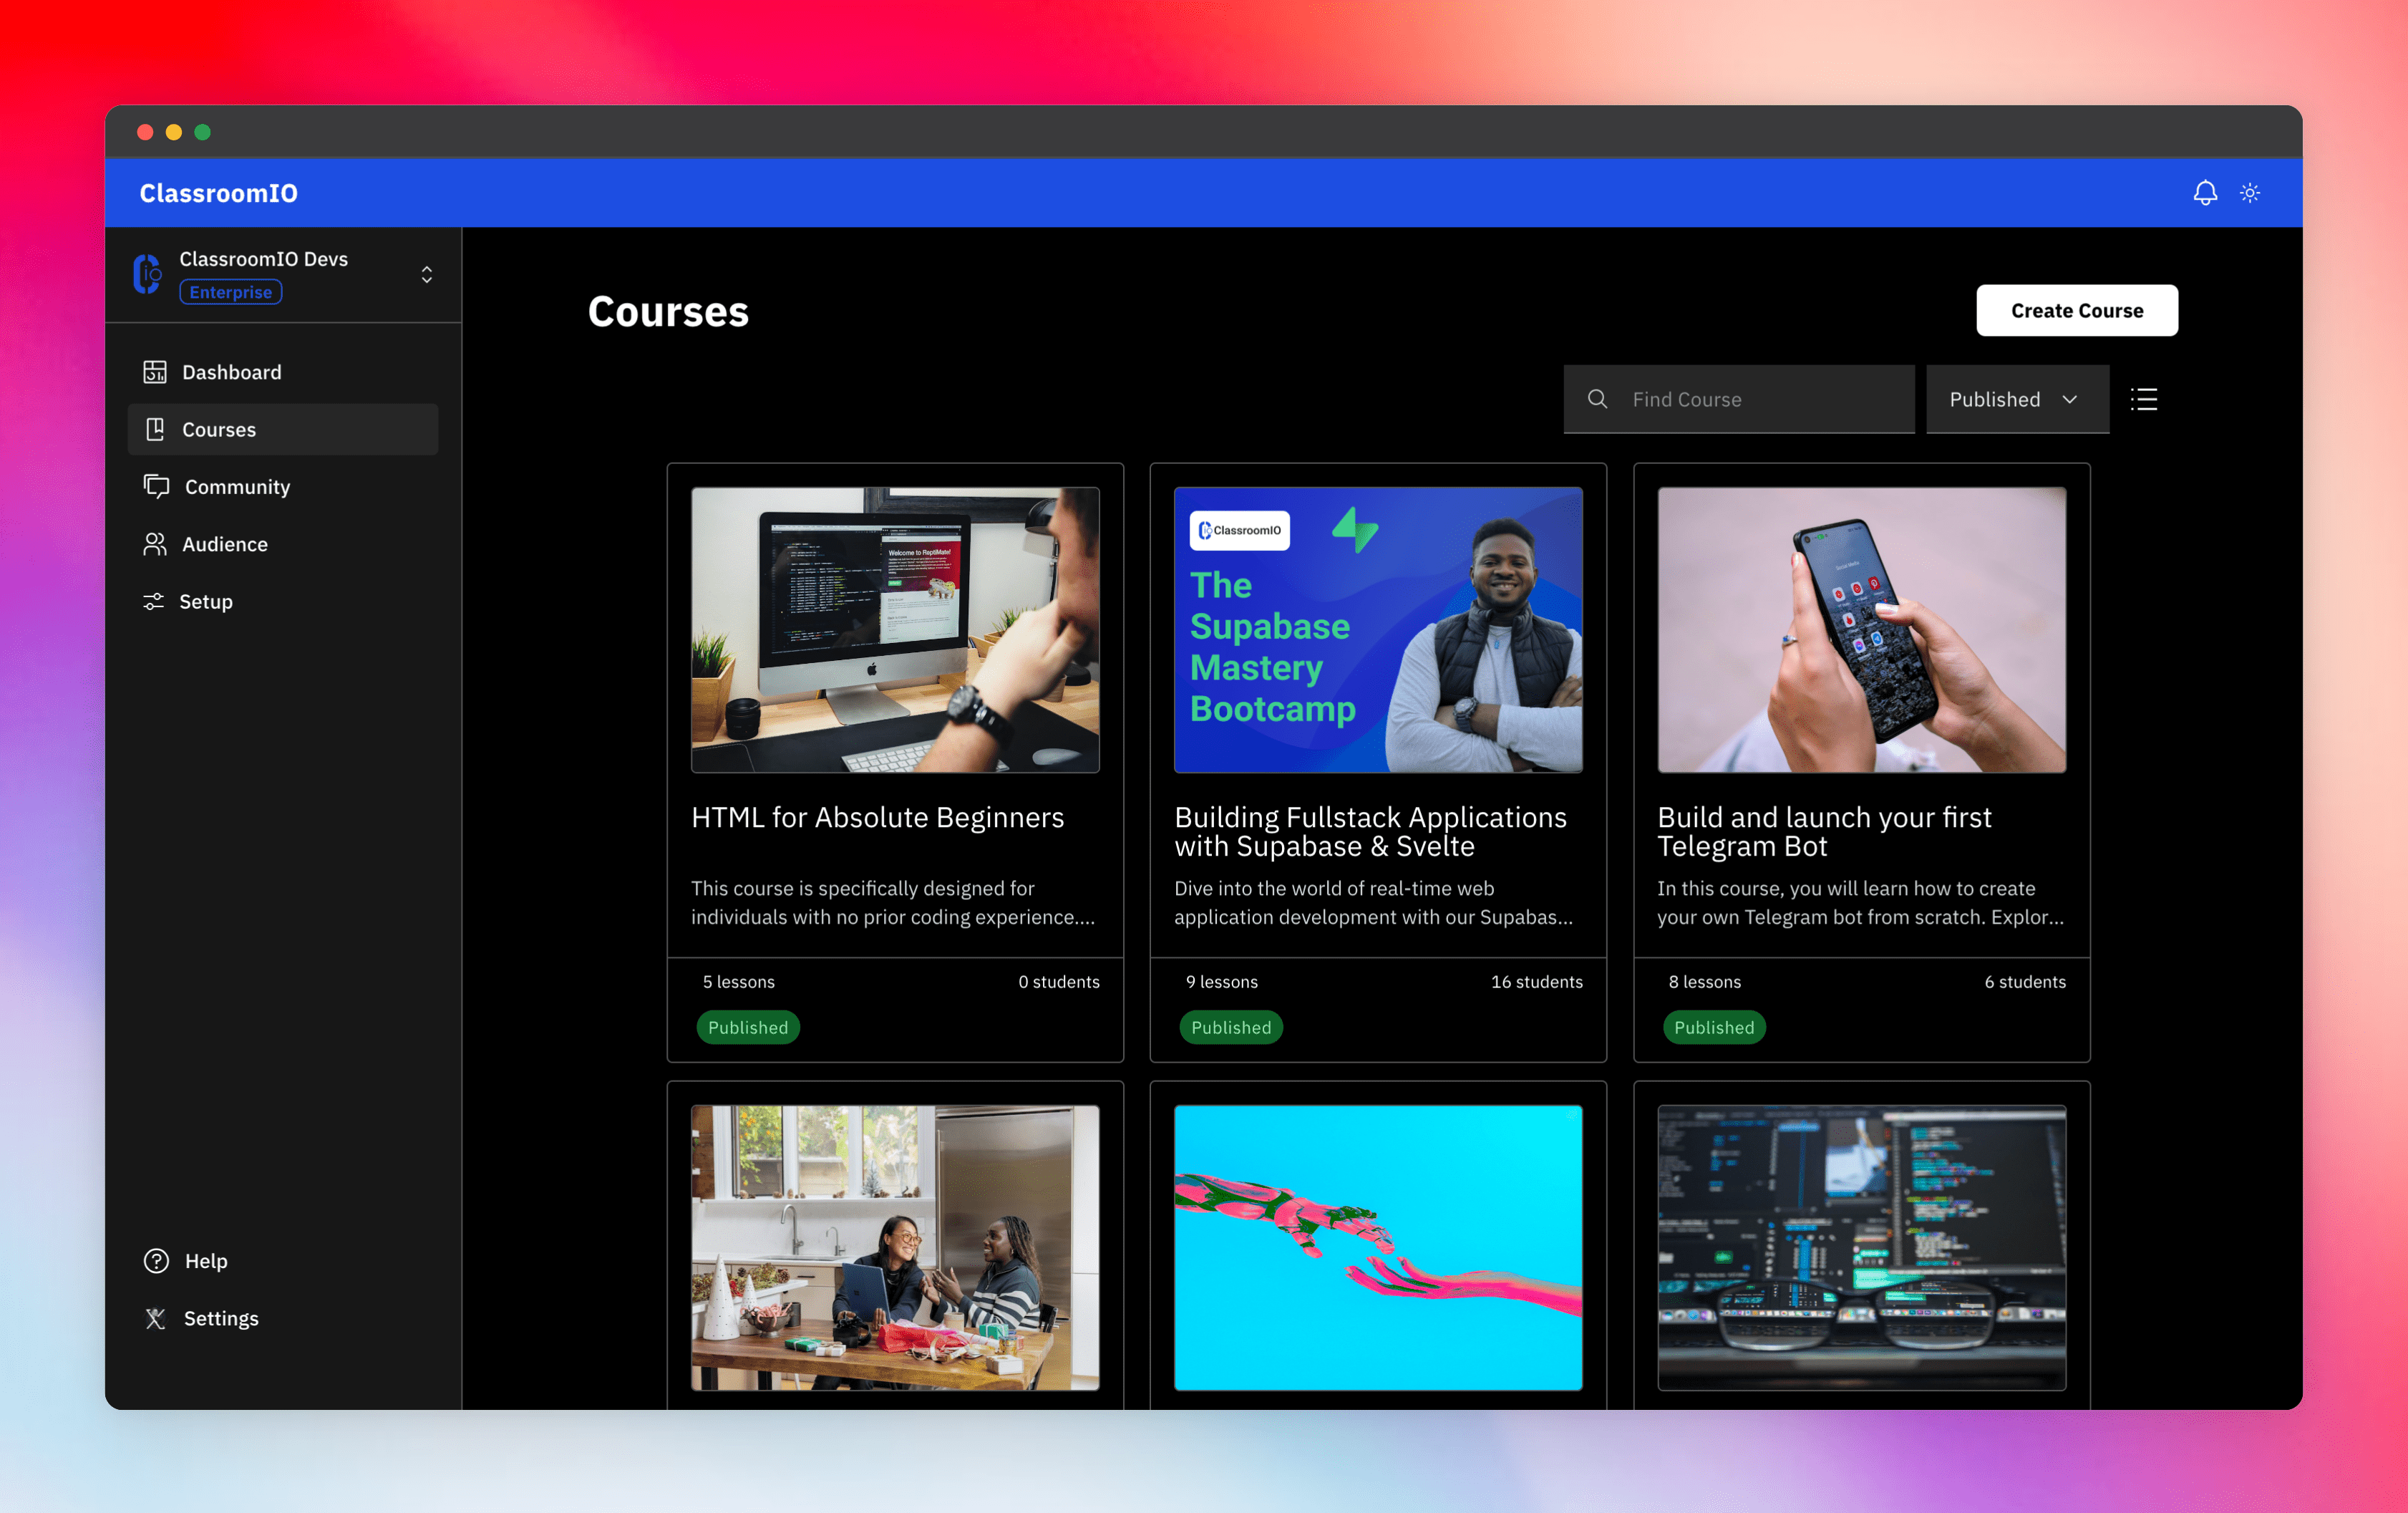
Within your dashboard you can do the following:
- Create multiple courses
- Create and Grade exercises
- Generate certificates
- Customise a course landing page
- Answer students questions in a forum
- Manage your students and much more
However that is not the UI that your audience will see when they consume your course. When a student signs up for your course, they get redirected to this UI
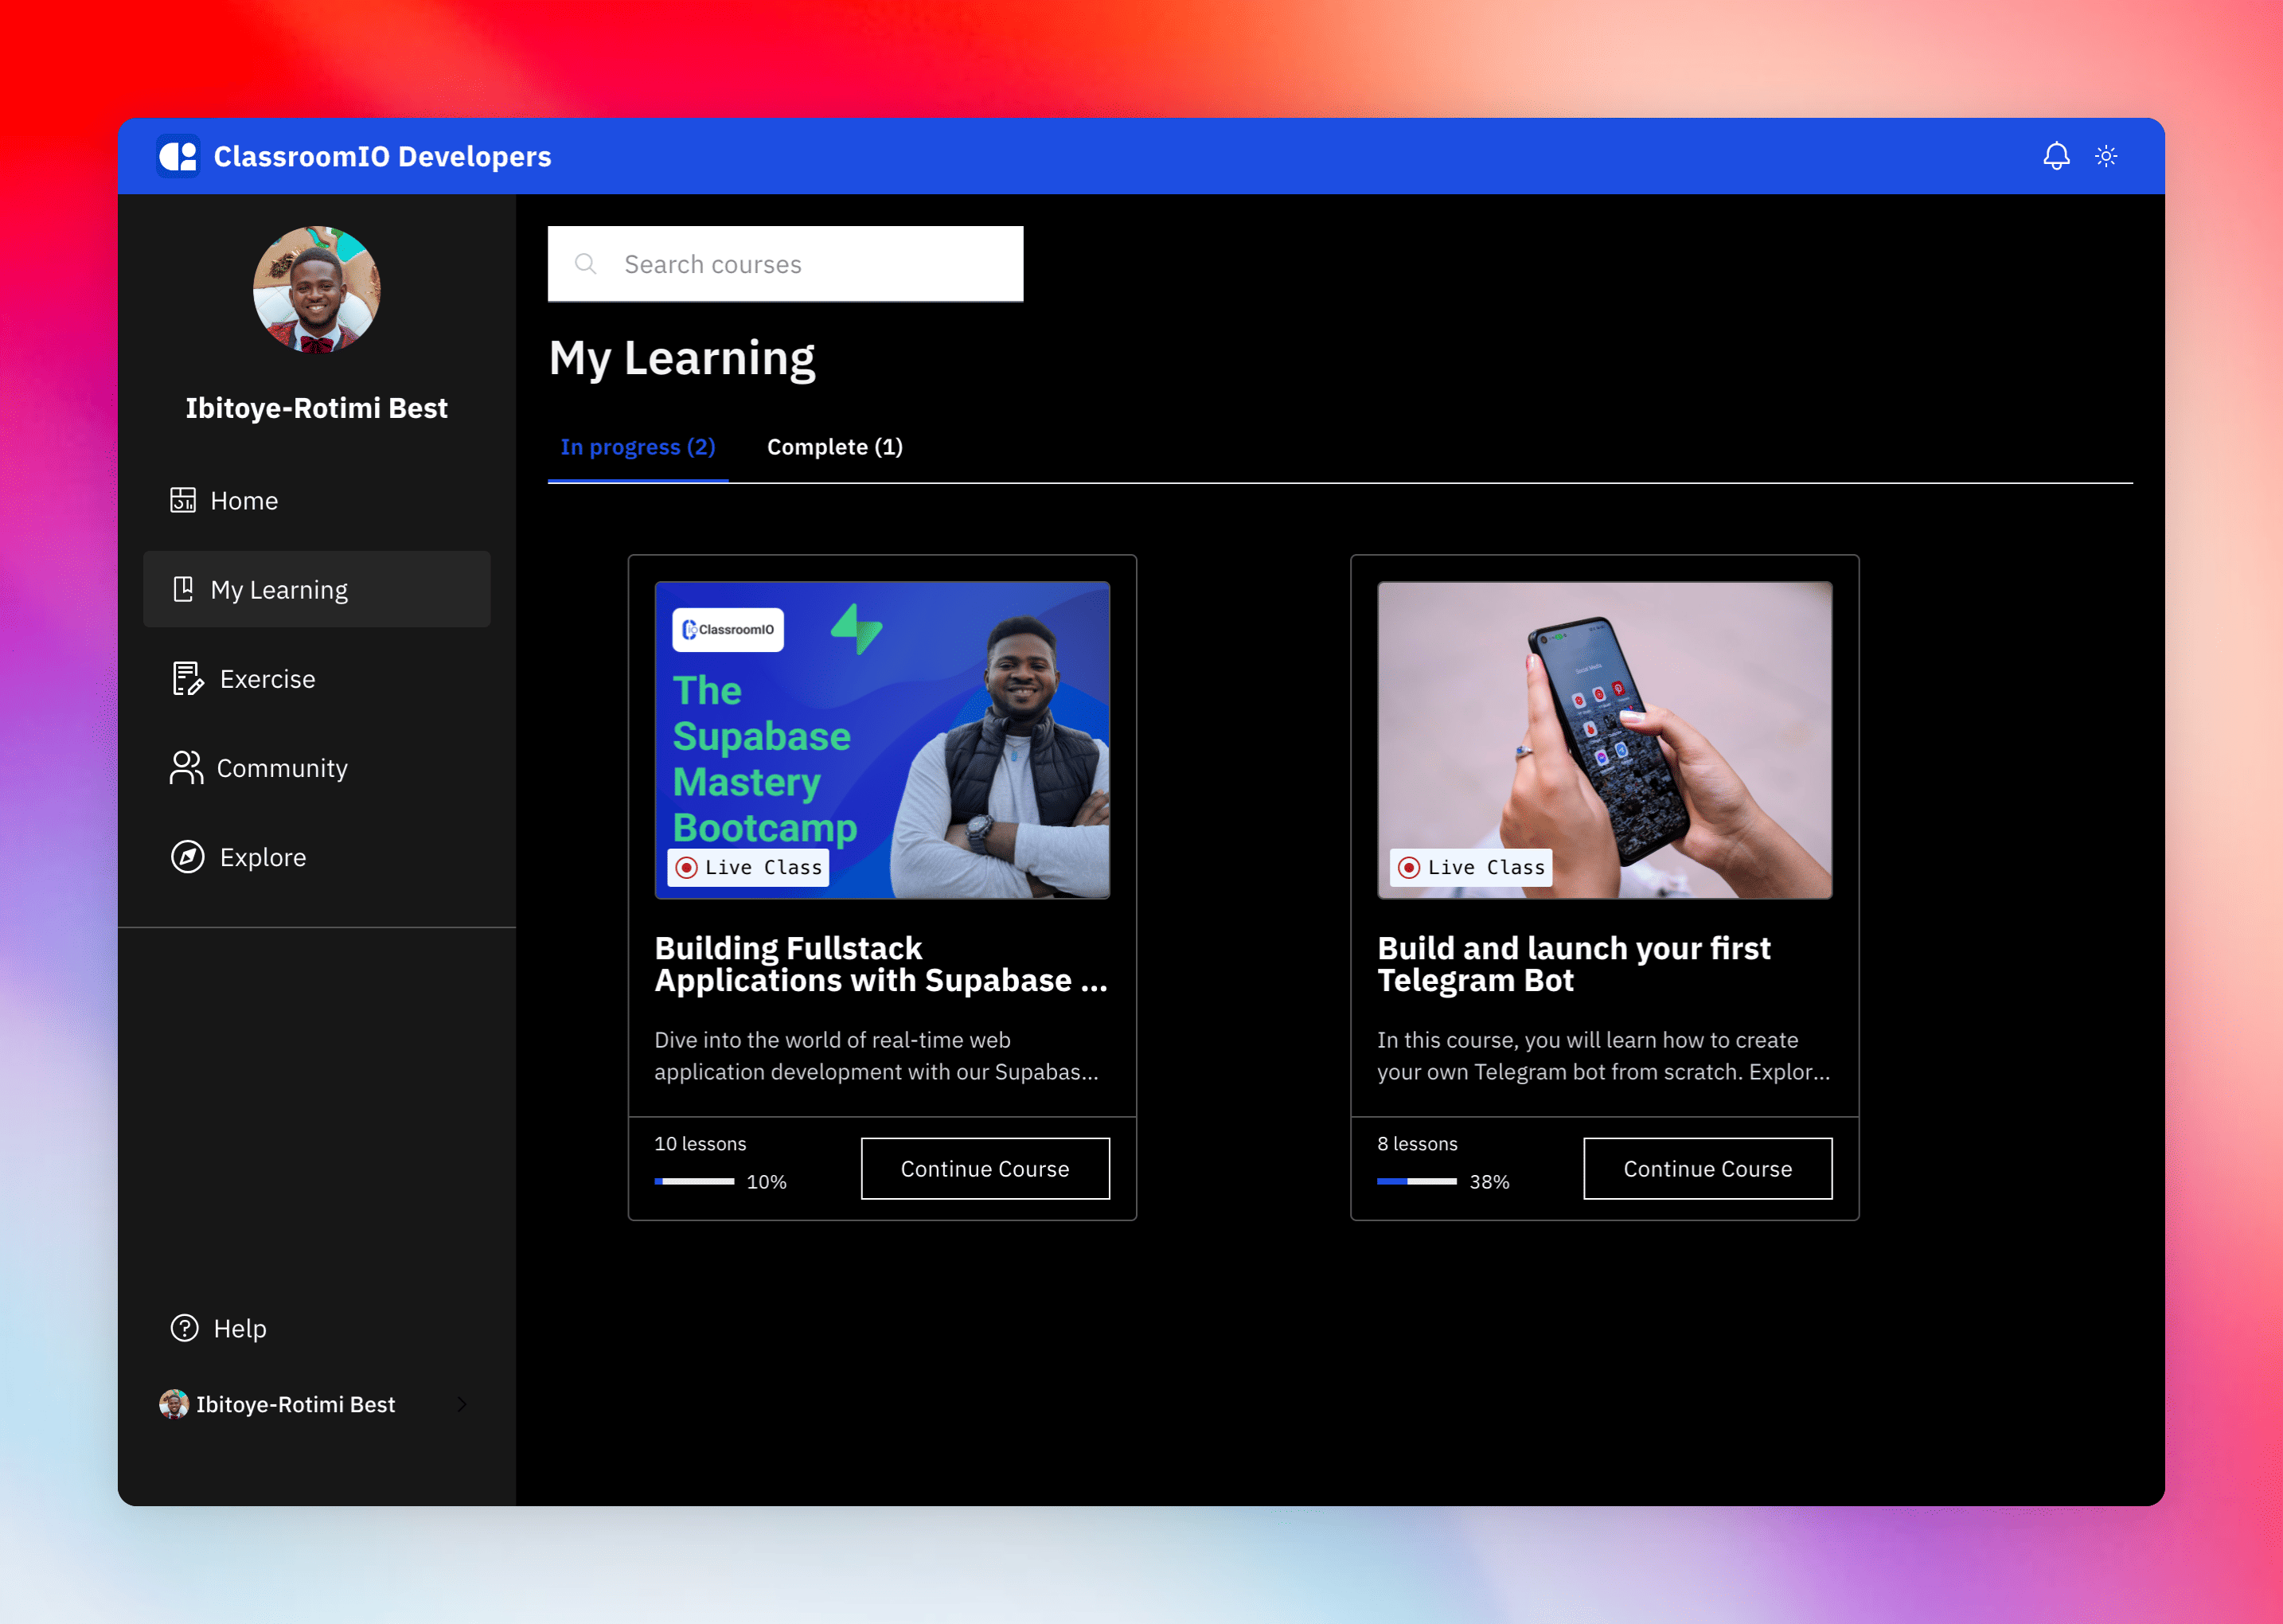
Typically this page can be found at yourorg.classroomio.com, where yourorg is a slug you set when you first set up your account. For example, we’ve built an internal bootcamp called ClassroomIO Developers, in this bootcamp we train other developers on some of the key tools we use internally. You can checkout our page here: ciodevs.classroomio.com, in this case you can see that our slug is ciodevs and you should be able to easily see yours when you log into the dashboard /org/{yourorg}.
In your student dashboard, your audience can:
- Consume enrolled courses
- Submit exercises
- Track the progress of their submitted exercises
- Engage with other students in a forum
- Explore other courses you’ve created.
Now to Brand Customisation
With the above foundation I already laid out, I will like to share some of the new things you can do within Your Student dashboard to make it feel more like your brand
Feature 1: Enable/Disable Features
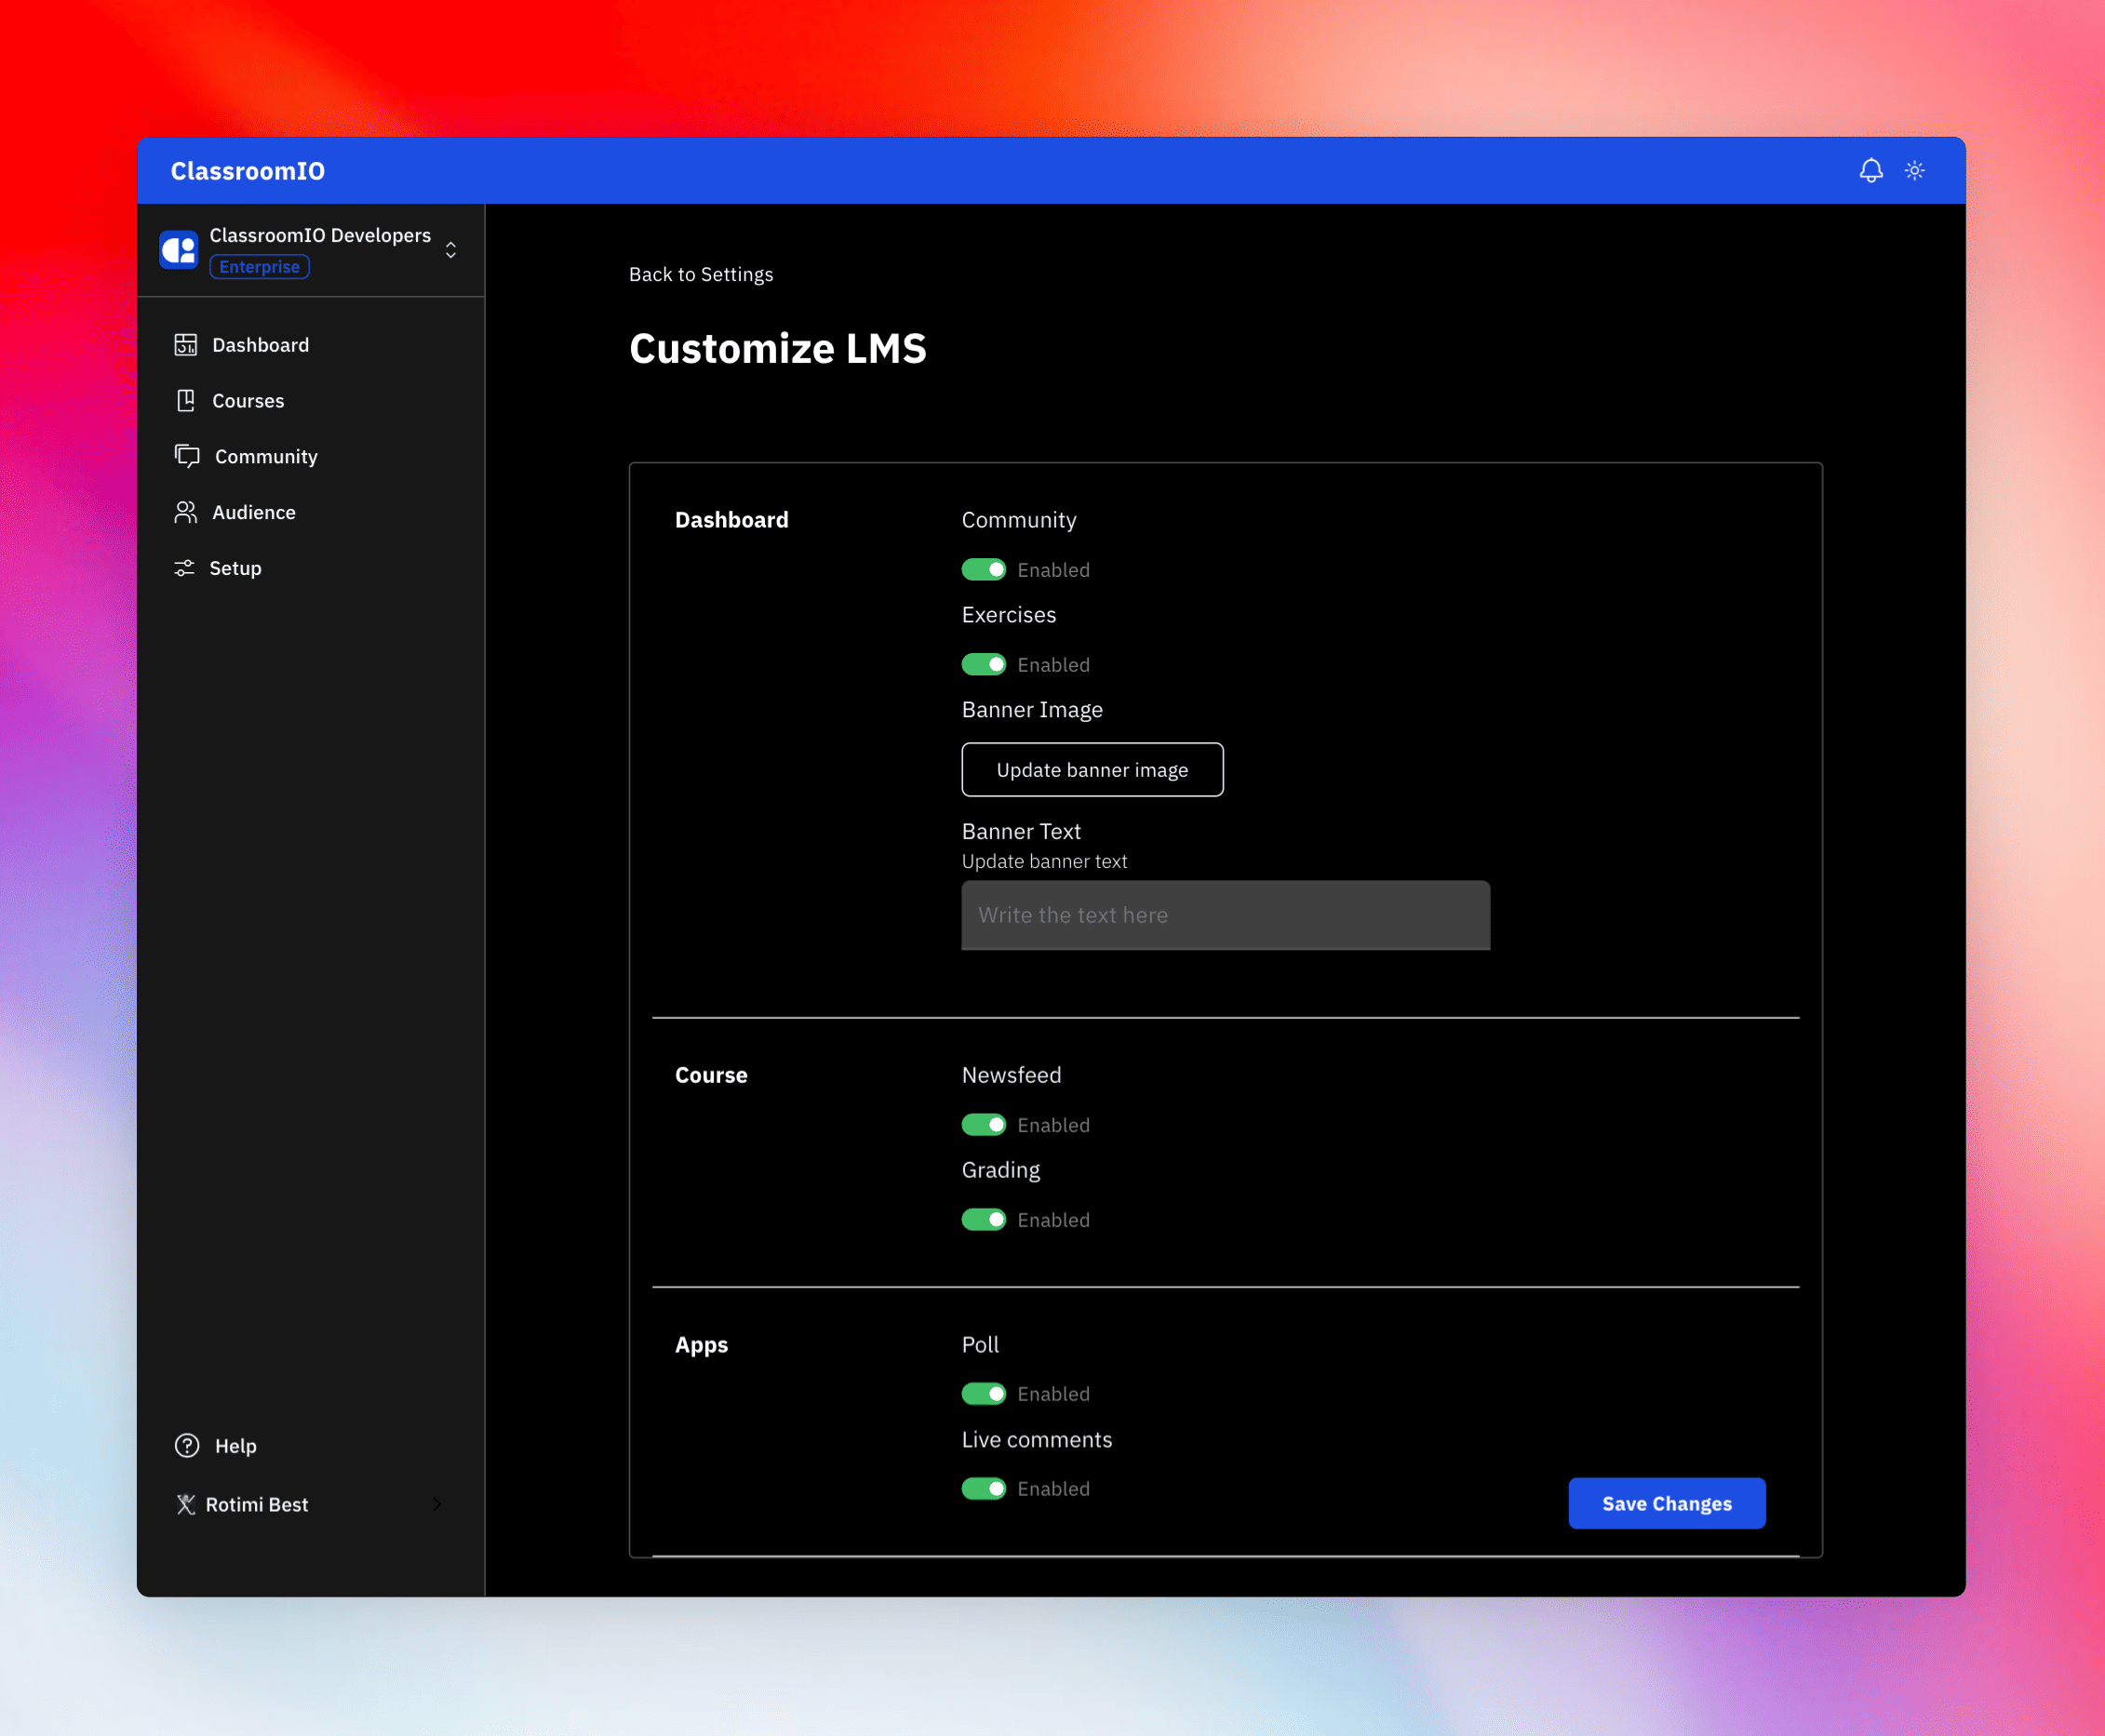
You can now go into your settings page and now disable the features within the student dashboard you don’t need. For example, if you run a certificate program and you don’t want students talking to other students rather you only need the students to take the course and then take tests - thanks to this feature you can now achieve that.
Any setting you disable within your dashboard will be reflected in your student dashboard on refresh.
Feature 2 - Brand Colour Customisation
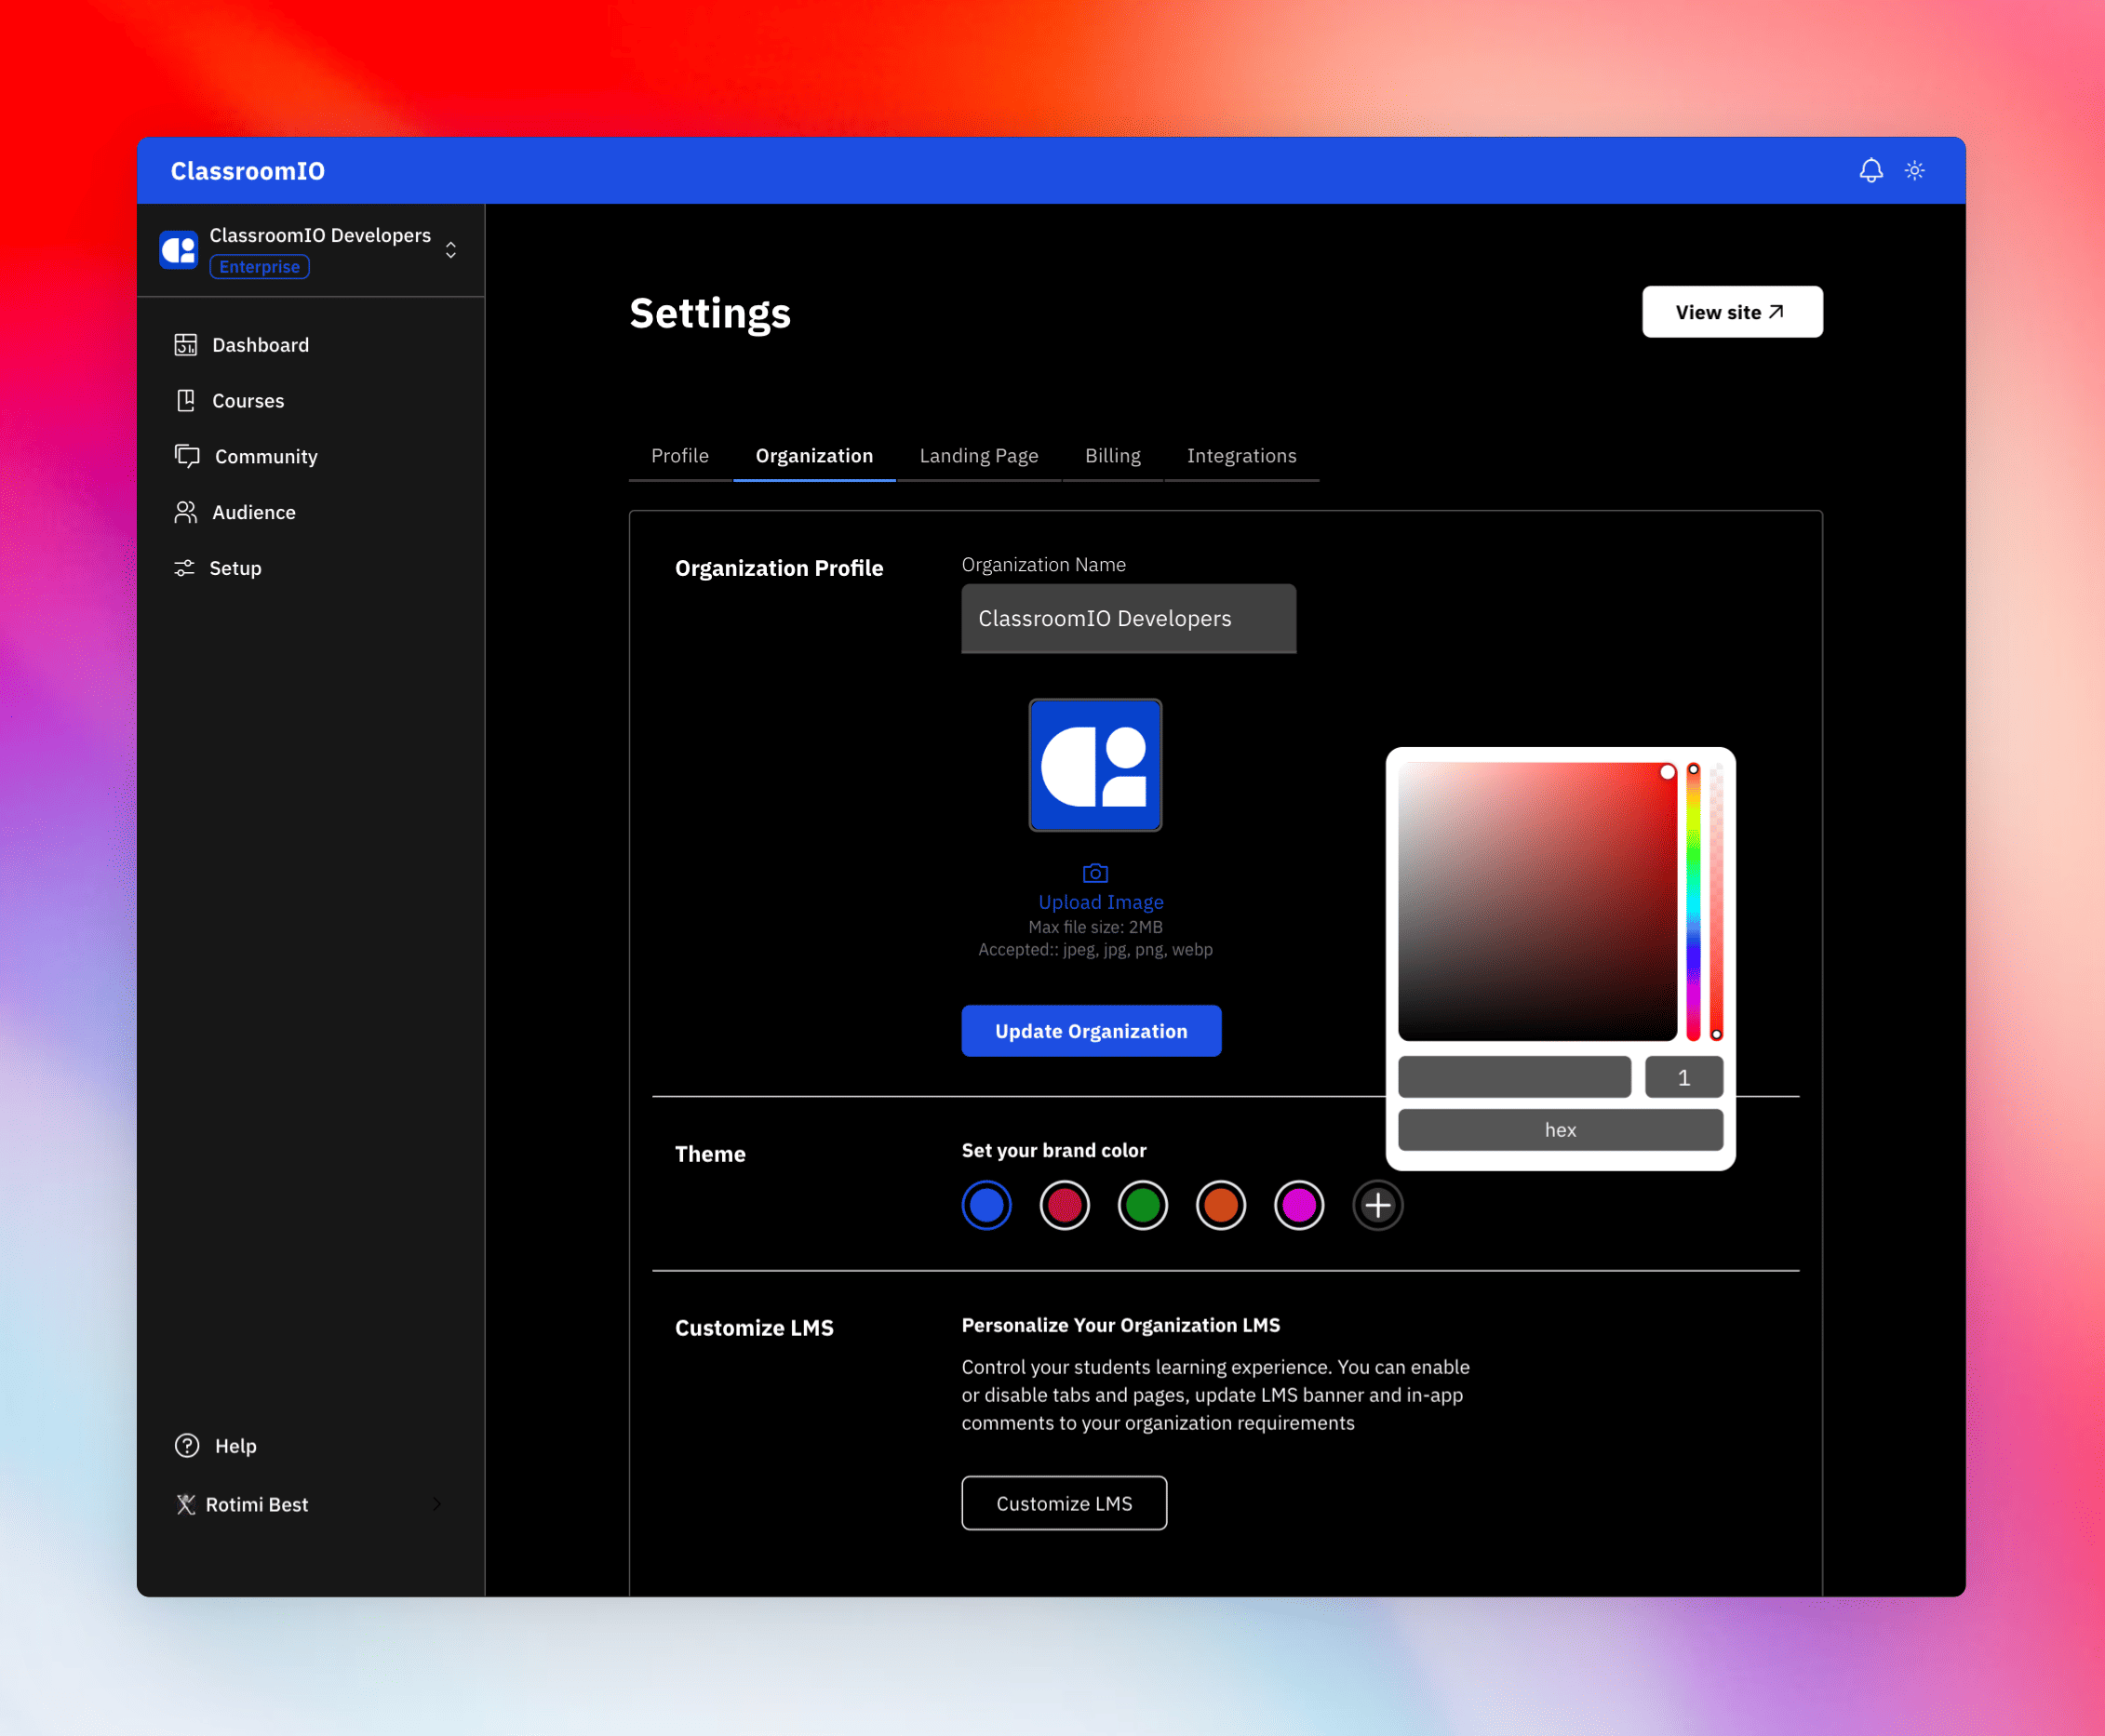
This has been one of the most requested customisation so far. Users loved that we allowed them set the brand color that reflected across the student dashboard, however that was limiting. Most companies had specific brand primary color which we didn’t have in the list, so we added - A COLOUR PICKER 😍.
Now within the dashboard, you can enter the hex code of your brand/company and instantly across the app the colour will be applied. You can watch the video at the top of the blog post to see this feature in action
Conclusion
Thank you very much for reading till the end, I know this was a lot 😅. Please give this update a try and let us know what you think about it on X.
Launch Week
LMS
Related Posts


